What is concrete grinding and why does surface prep decide whether a coating lasts?
Concrete grinding uses a rotating machine fitted with diamond-impregnated metal or resin segments to abrade the surface of a slab. The goal is not to make the floor look pretty on its own — it is to physically open the concrete so a liquid coating can grip it. Fresh from the trowel, the top of a slab is covered in a weak, dusty layer called laitance, and it is often dense and closed enough that liquids bead on top instead of soaking in. A coating applied over that layer is essentially glued to a layer that is already failing.
Surface prep matters because epoxy and polyaspartic coatings bond mechanically, not magically. The coating flows into the microscopic peaks and valleys created by grinding and hardens there, creating thousands of tiny anchors. Industry guidance from the International Concrete Repair Institute (ICRI) describes this texture on a Concrete Surface Profile (CSP) scale from CSP 1 (nearly smooth) to CSP 9 (very rough). Most thin-film floor coatings, like a typical garage epoxy, call for roughly CSP 1–3, while thicker self-leveling or mortar systems need a more aggressive profile.
This is the step most weekend kits and bargain installers skip, and it is the most common reason a floor fails within a year or two. If a quote sounds dramatically cheaper than the others, the difference is almost always in the prep — acid etching or a quick scuff instead of full diamond grinding. The coating itself is rarely what fails; the bond underneath it is.
How the diamond grinding process works, step by step
A proper prep job follows a repeatable sequence, and each step exists to solve a specific bonding problem.
The result is a slab that looks dull, uniform, and slightly textured — exactly what you want before a coating goes down. A floor that still looks shiny or sealed in spots has not been ground enough to bond reliably.
- Inspect and test: We check the slab for existing coatings, cracks, moisture, oil saturation, and hardness. A simple water-drop test shows whether the concrete is open (water soaks in) or sealed (water beads).
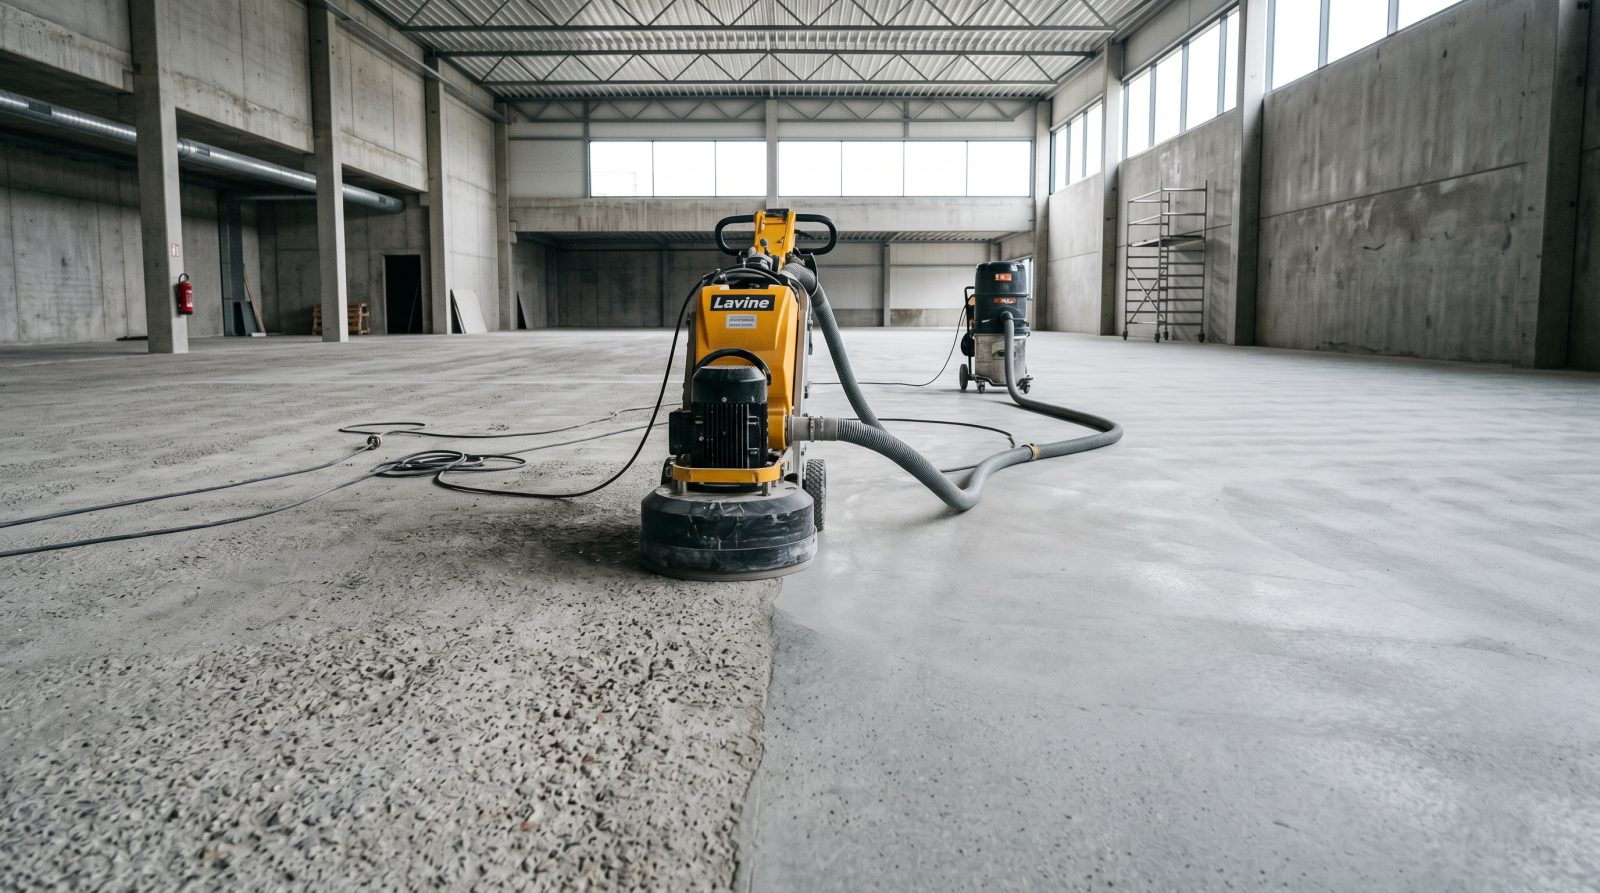
- Contain the dust: Grinders are run with HEPA-rated dust extractors so the work is effectively dust-free. This protects your home's air and is the standard for indoor and garage work.
- Grind the surface: Diamond tooling removes laitance, old coatings, paint, and glue while flattening high spots. Tooling grit is chosen to hit the target CSP for the coating system being used.
- Detail the edges: A handheld edge grinder reaches the perimeter, corners, and around posts where the big machine can't, so the whole floor is profiled — not just the middle.
- Repair and fill: Cracks, spalls, pitting, and old anchor holes are chased out and filled with a structural patch or polymer repair so they don't telegraph through the finish.
- Clean thoroughly: The floor is vacuumed and wiped so no dust sits in the profile. Dust left in the texture acts like a release agent and undermines adhesion.
Grinding vs. shot blasting vs. acid etching: which prep method is right?
Not all surface prep is equal, and the right method depends on the coating and the slab. Three approaches dominate residential and light-commercial floor work, and they are very different in quality.
Diamond grinding is the most versatile and is our default for garage, patio, basement, and interior floors. It controls the profile precisely, works on almost any slab, removes most existing coatings, and runs dust-free with extraction. Shot blasting fires steel shot at the surface and leaves a deeper, more aggressive profile; it is well suited to large commercial areas and very thick coating systems, but the texture it leaves is often more than a thin garage coating needs. Acid etching, where a homeowner pours an acid wash on the slab, is the method we generally steer people away from for coatings that need to last: it is inconsistent, it cannot remove oil or old coatings, it leaves residue that can interfere with bonding, and it does almost nothing to flatten a floor.
If a contractor proposes acid etching as the only prep before an epoxy floor, treat that as a warning sign. It is fast and cheap, but it does not produce a reliable, measurable profile — and that is the whole point of prep.
Moisture, temperature, and humidity: the conditions that make or break the bond
Even perfect grinding can be undone by what is happening inside and above the slab. Concrete is porous, and water vapor moving up through the slab from the soil below is one of the leading causes of coating failure. Before coating, the slab's moisture should be evaluated — commonly with a calcium chloride test (measuring moisture vapor emission rate in pounds per 1,000 sq ft over 24 hours) or relative humidity probes set into the slab per ASTM standards. Slabs with a high moisture reading need a moisture-mitigating primer, or the coating can blister and peel as vapor pushes from underneath.
Air and surface temperature matter just as much. Most epoxy and polyaspartic coatings are designed to be applied roughly between 50°F and 90°F surface temperature, and at least 5°F above the dew point so condensation doesn't form on the slab during cure. Cold slows the cure dramatically; heat speeds it up and shortens working time. Polyaspartics in particular are sensitive — in warm conditions a batch can start setting in the bucket faster than expected.
The South Bay's mild, dry Mediterranean climate means extreme temperature swings are less of a problem here than in many regions, but two local realities still come up often. Garages and patios that catch the strong afternoon sun off San Francisco Bay can heat up enough to shorten cure windows, so we often schedule those pours for the cooler part of the day. And many older homes across San Jose, Santa Clara, and the Peninsula sit on slabs poured directly on grade without a vapor barrier, so they can carry more ground moisture than expected — especially after a wet winter. Both are manageable, but only if they're tested for before the coating goes down, not discovered after.
Common slab problems we find and fix during prep
Grinding doesn't just profile the floor — it exposes the slab's true condition, which is often hidden under dirt, old paint, or a previous coating. Addressing these issues during prep is what separates a finish that looks flat and uniform from one that highlights every flaw.
Handling these before coating is far cheaper and cleaner than trying to fix them after, when the only option is to grind the new coating back off.
- Oil and grease saturation: Common in garages. Oil that has soaked deep into the concrete must be ground out or chemically degreased, because coatings will not bond to a contaminated slab.
- Cracks and control joints: Static cracks are routed and filled; moving cracks and joints are treated so the coating doesn't crack along the same line later.
- Pitting and spalling: Surface voids and flaking are filled with a patch compound so the finished floor reads as smooth.
- Old coatings and glue: Carpet glue, tile mastic, and failing paint or epoxy are ground away so the new system bonds to bare concrete, not to a failing layer.
- High and low spots: Grinding knocks down high points; deeper low areas can be filled so the floor drains and looks level.
- Hairline surface dusting: Soft, dusting concrete is ground past until solid material is reached, giving the coating something strong to anchor to.
How long does surface prep take, and what does it typically cost?
For a standard residential garage or similar room, the grinding and prep phase commonly takes a portion of a single day, with crack and spall repairs sometimes needing additional cure time before coating begins. A larger floor, a slab with heavy oil saturation, or one with an old coating to remove will take longer because more material has to come off. Prep is also where surprises live — until the grinder opens the slab, no one can be completely certain what's underneath an old finish.
On cost, surface prep is usually bundled into the total price of a floor-coating project rather than billed as a standalone line item, and pricing varies with slab size, condition, and how much old material must be removed. As a rough, clearly-labeled typical range, full diamond-grind prep plus a coating system often falls somewhere from a few dollars to several dollars per square foot installed, with heavily contaminated or badly cracked slabs costing more because of the extra labor. These figures are typical ranges for budgeting only — not a quote and not a fixed price. The only way to know your number is an on-site look at your actual slab.
The honest way to think about prep cost is as insurance on the coating. The grinding is a meaningful share of the labor precisely because it's the part that determines whether the finish holds up for years or fails in months. To get an estimate based on your specific floor, give us a call and we'll walk through it with you.